Defining Form Section Layout
To define the layout of a form section, double click on the form section entry on the Forms tab of a business object (or click on the  icon at the top of the table. The Form Section designer for the selection section is then displayed in a separate window.
The layout of the section represents a table consisting of rows and columns. Each cell in this table represents an attribute (sometimes several attributes) or it can contain an HTML or be empty. By default the table has a single column so the attributes are laid out in a top-down fashion.
The Form Section Designer has two modes – the Preview mode and the Table Layout mode. In the Preview mode the changes you make to the layout of the form section are immediately displayed in the embedded browser, so that you can immediately see how the form will look like in the browser. A form is represented by a table consisting of cells. Each cell contains specific information – either an attribute or several attributes or HTML or a Google Map. In the Table Layout mode the cells are represented by an entry in the table (see the picture below). In the Preview mode cells are harder to see but you can still notice small dividing lines between them. You switch between modes by clicking on the  and
 icons at the top of the editor.
The pictures below show a particular form section in the Table Layout mode and Preview mode respectively:
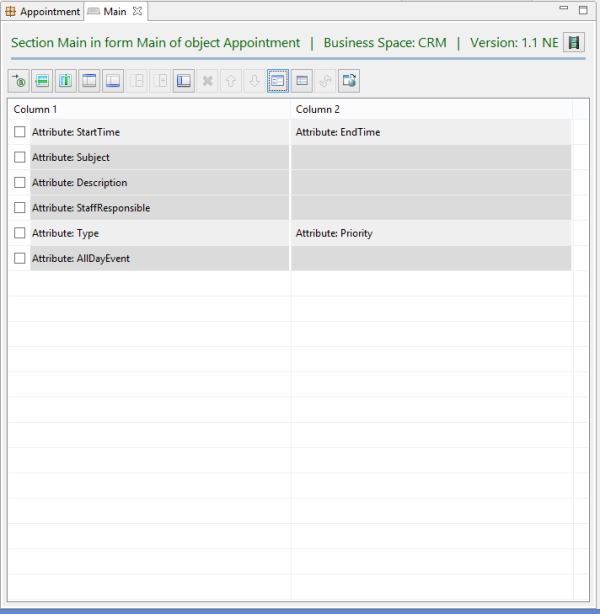
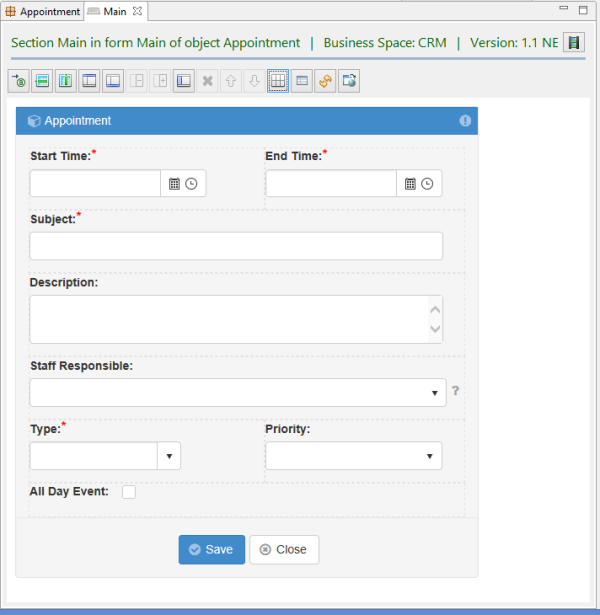
Most of the time you will be working in the Preview mode so that you can immediately see how the form looks in the browser. But sometimes selecting the cells you want to work with is difficult in the Preview mode, so in this case you can switch to the Table Layout mode, perform the changes and switch back to the preview mode. Note also that you can always see how the form section looks like in the standalone browser by clicking on the  icon.